
Ultimate Drummer’s IEM Rig
In recent years, In Ear Monitors (IEMs) have become a mainstay of live events around the globe. A slick and discreet way of on stage monitoring, they’re an obvious choice for many musicians, especially when backing tracks and clicks become involved, as they are a great deal now. They’re a key piece of gear for musicians, and drummers especially to be familiar with and able to use at a moments notice. Personally, i’ve been an IEM user for about 3 years now, and in that time i’ve experimented with many a rig and setup idea, from a full out backing track rig (but thats another story! - for information on such things head to Drum Electric) to a compact setup which I use on club and theatre shows (that all goes in a case smaller than your average snare drum case!). I’ll set a couple of rough budgets, for a full setup with Universal In Ears - £250, and for the same setup with Custom In Ears - £500.
The perfect Budget system in my opinion
Wireless & Hardwired
Let’s jump straight in and look at the difference between Wireless and Hardwired rigs. Wireless in ear systems generally consist of a transmitter box placed at the mixing desk or side-stage, which sends the signal via radio frequency to a small receiver pack worn on the performers belt. This system is most commonly used for musicians and singers who are going to be moving around on stage, as it gives the freedom of movement. The downside of wireless systems, is that they’re generally expensive, and those budget ones can have issues with signal loss and reliability, so for the likes of keyboard players and drummers, a hardwired setup is a much more reliable option.
In a nutshell, hardwired systems run from a direct cable (usually an XLR) from the sound desk down to your position on stage, which carries your mix and is plugged into a headphone amplifier or small mixing desk, usually to the side of the musician (though some of these can be belt worn or mounted elsewhere) and the in ears are run out of this. The drawbacks of this are the limited movement, basically being tied to your chair by the length of the headphone cable, but for drummers its the simplest and most budget friendly option, and the one I use myself.
Its worth knowing that both of these systems (and everything in this blog) relies on the sound desk you’re using to have an AUX or monitor send, and you either being able to mix it yourself (either at the desk, or using an app if its a wireless desk, like the Behringer XR18, or the QSC Touchmix), or having a sound engineer to mix it for you, to be able to get the most out of it, as these all just have a volume and L/R channel balance control, so you can’t really change a bad mix mid song!


Amps & Mixers
Looking at hard wired amps, there’s a few things to consider. A start is how you’re going to power it, whether through batteries or on the mains. Personally I prefer to run on mains power, as batteries can be unreliable (and you are usually lucky to get 3 gigs on one 9V), and i’d hate the thought of something cutting out mid set in front of a paying crowd. The other thing with batteries is the expense, of either continually buying them, or using rechargeable batteries and making sure you have them all prepped before the gig, every time. Even though I use mains power though, I always keep a couple of fresh 9V batteries in the case, in the live music industry, redundancy is key, so always having a backup plan is worthwhile.
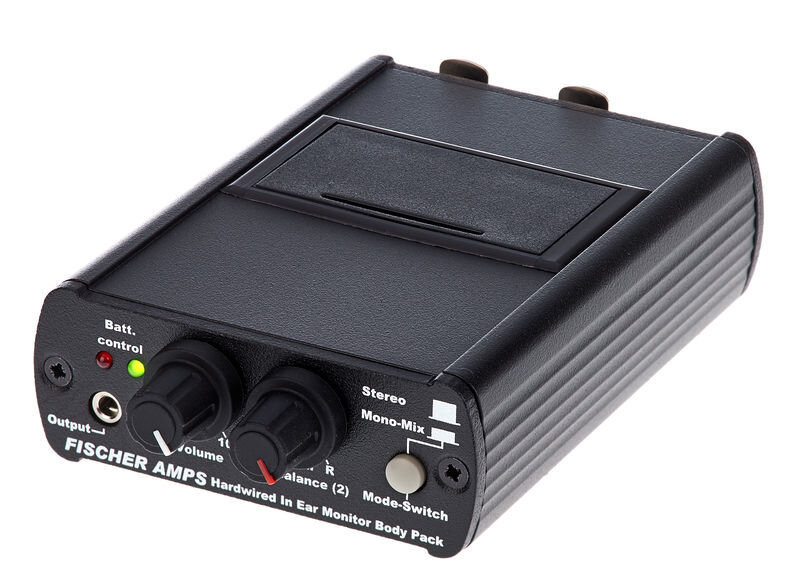
There’s two main options as far as amplifiers, the Behringer Powerplay P1, and the Fischer Amps body pack. Shure also makes a hardwired pack, though this is considerably more expensive. Both the Fischer and Behringer are able to be ran on mains power, through 9V DC Adapters. Both of these can be set to run on both stereo and mono monitor feeds, so can be easily plugged in on stage, and both have a volume control and balance knob to allow maximum adjustment. Though both Amps are very similar in design and function, the primary differences is the mounting options, and the price. The Behringer amp has 2 mounting options by way of a belt clip, which allows it to be worn as a wireless pack would be or mounted by a 3/8” thread, the same as that of a microphone clip, allowing it to be mounted on a mic stand or clamp. Personally, I have come to prefer mounting it beneath my drum throne top, so its discreet but easily accessible to plug in and adjust mid gig. I use a K&M 238 Microphone clamp mounted on the stool’s down tube. Whereas, the Fischer has no mounting options at all, so would either need to be sat on the floor or a small accessory table, or have industrial strength velcro added to it (and the underside of the stool top) to allow the same mounting as the Behringer.
Price wise, the Behringer amp retails for around £40, and the Fischer is about £160. This is a significant difference and i’d say the Behringer offers far better value for money, and in my experience is an equally rigid and well designed product as the Fischer, with the added features of those mounting options to make it much easier to fit around your setup, and thats the reason why its the amp I use on most of my work.
On a side note, there are other, smaller amps available, the likes of the Behringer P2 and the Fischer In Ear Stick, but I have omitted these on the grounds they can’t be mains powered or utilised to the same extent. Furthermore, a small 2-4 channel mixer can be used, and there are many other articles on this in particular (linked at the bottom of this page), so I have omitted these for the same reason.


Universal or Custom IEMs?
In ears usually come in two types, universal fit, and custom moulded. Universal fit (also known as generic fit) monitors are designed to be a one size fits all, with interchangeable rubber/memory foam tips to best fit the users ear canal. Custom moulded monitors are much more bespoke, and are made to an exact mould or scan of the wearers ears, so they seal off each ear perfectly and block out the maximum amount of outside noise. IEM’s are usually priced depending on how many drivers they have (drivers being like tiny speakers), and the more that are in there, the more clarity there will be in the sound. Anything with 3 or more drivers per side is usually considered the higher end of monitors, for both universal and custom.
The cheapest IEM’s that i’ve had are the Shure SE215s, which are single driver, universal in ears, they come in either clear or black plastic shells, with a number of tips to select from for the most comfortable fit and optimum seal. They have a nice clear sound to them, and are pretty good in all frequencies, though lack a bit of bass in my option, which is down to them being single drivers. However they’re priced well at £100 so make a really great option for the lower end of the budget, and there are higher end universal models with more drivers should you decide to go that route.
Gross photo alert! These were my ear moulds.
As for custom moulds, there’s a plethora of companies you can use to manufacture your in ears, all will require a mould to be taken of your inner ear, usually by a specialist audiologist, to the correct specifications, which they’ll make the shell to exactly for the best fit and most isolation. Custom in ears usually come in two types material wise, soft and flexible silicone, which some find more comfortable but isn’t as long lasting, or hard acrylic shells, which are tougher but perhaps a little less comfortable to some. Personally I use Cosmic Ears (and i’m now an endorser for them too) so i’ll stick to those as I’m familiar with the product range, and have practical experience in using them on gigs, but feel free to go and check out some of the other companies, the likes of Ultimate Ears, 64 Audio, ACS and Read Audio. The best ‘bang for your buck‘ Cosmic Ears (in my opinion) are the CE3P’s, which are triple driver in ears, with 3 balanced-armature drivers per side, which are split to 2 for the low/mid frequencies, and 1 for the high frequencies. They are priced competitively for what they are, at £420. These IEMs are really some of the best i’ve used, the fit and finish is perfect, and there’s endless colour and design combinations, with options for graphics, logo and even sparkly glitter finishes, whichever takes your fancy!
For me, the universal fit Shures are a great option for someone on a budget, and I still keep my set for general listening and as a backup (All about redundancy again!) when i’m on the road. But after years of using generic fit IEMs, I made the jump to custom moulds, and i’d really never go back now! They’re far superior to anything universal fit, and the sound quality is much better for it in my opinion. But shop around and see what is best for you and what matches your needs and budget.


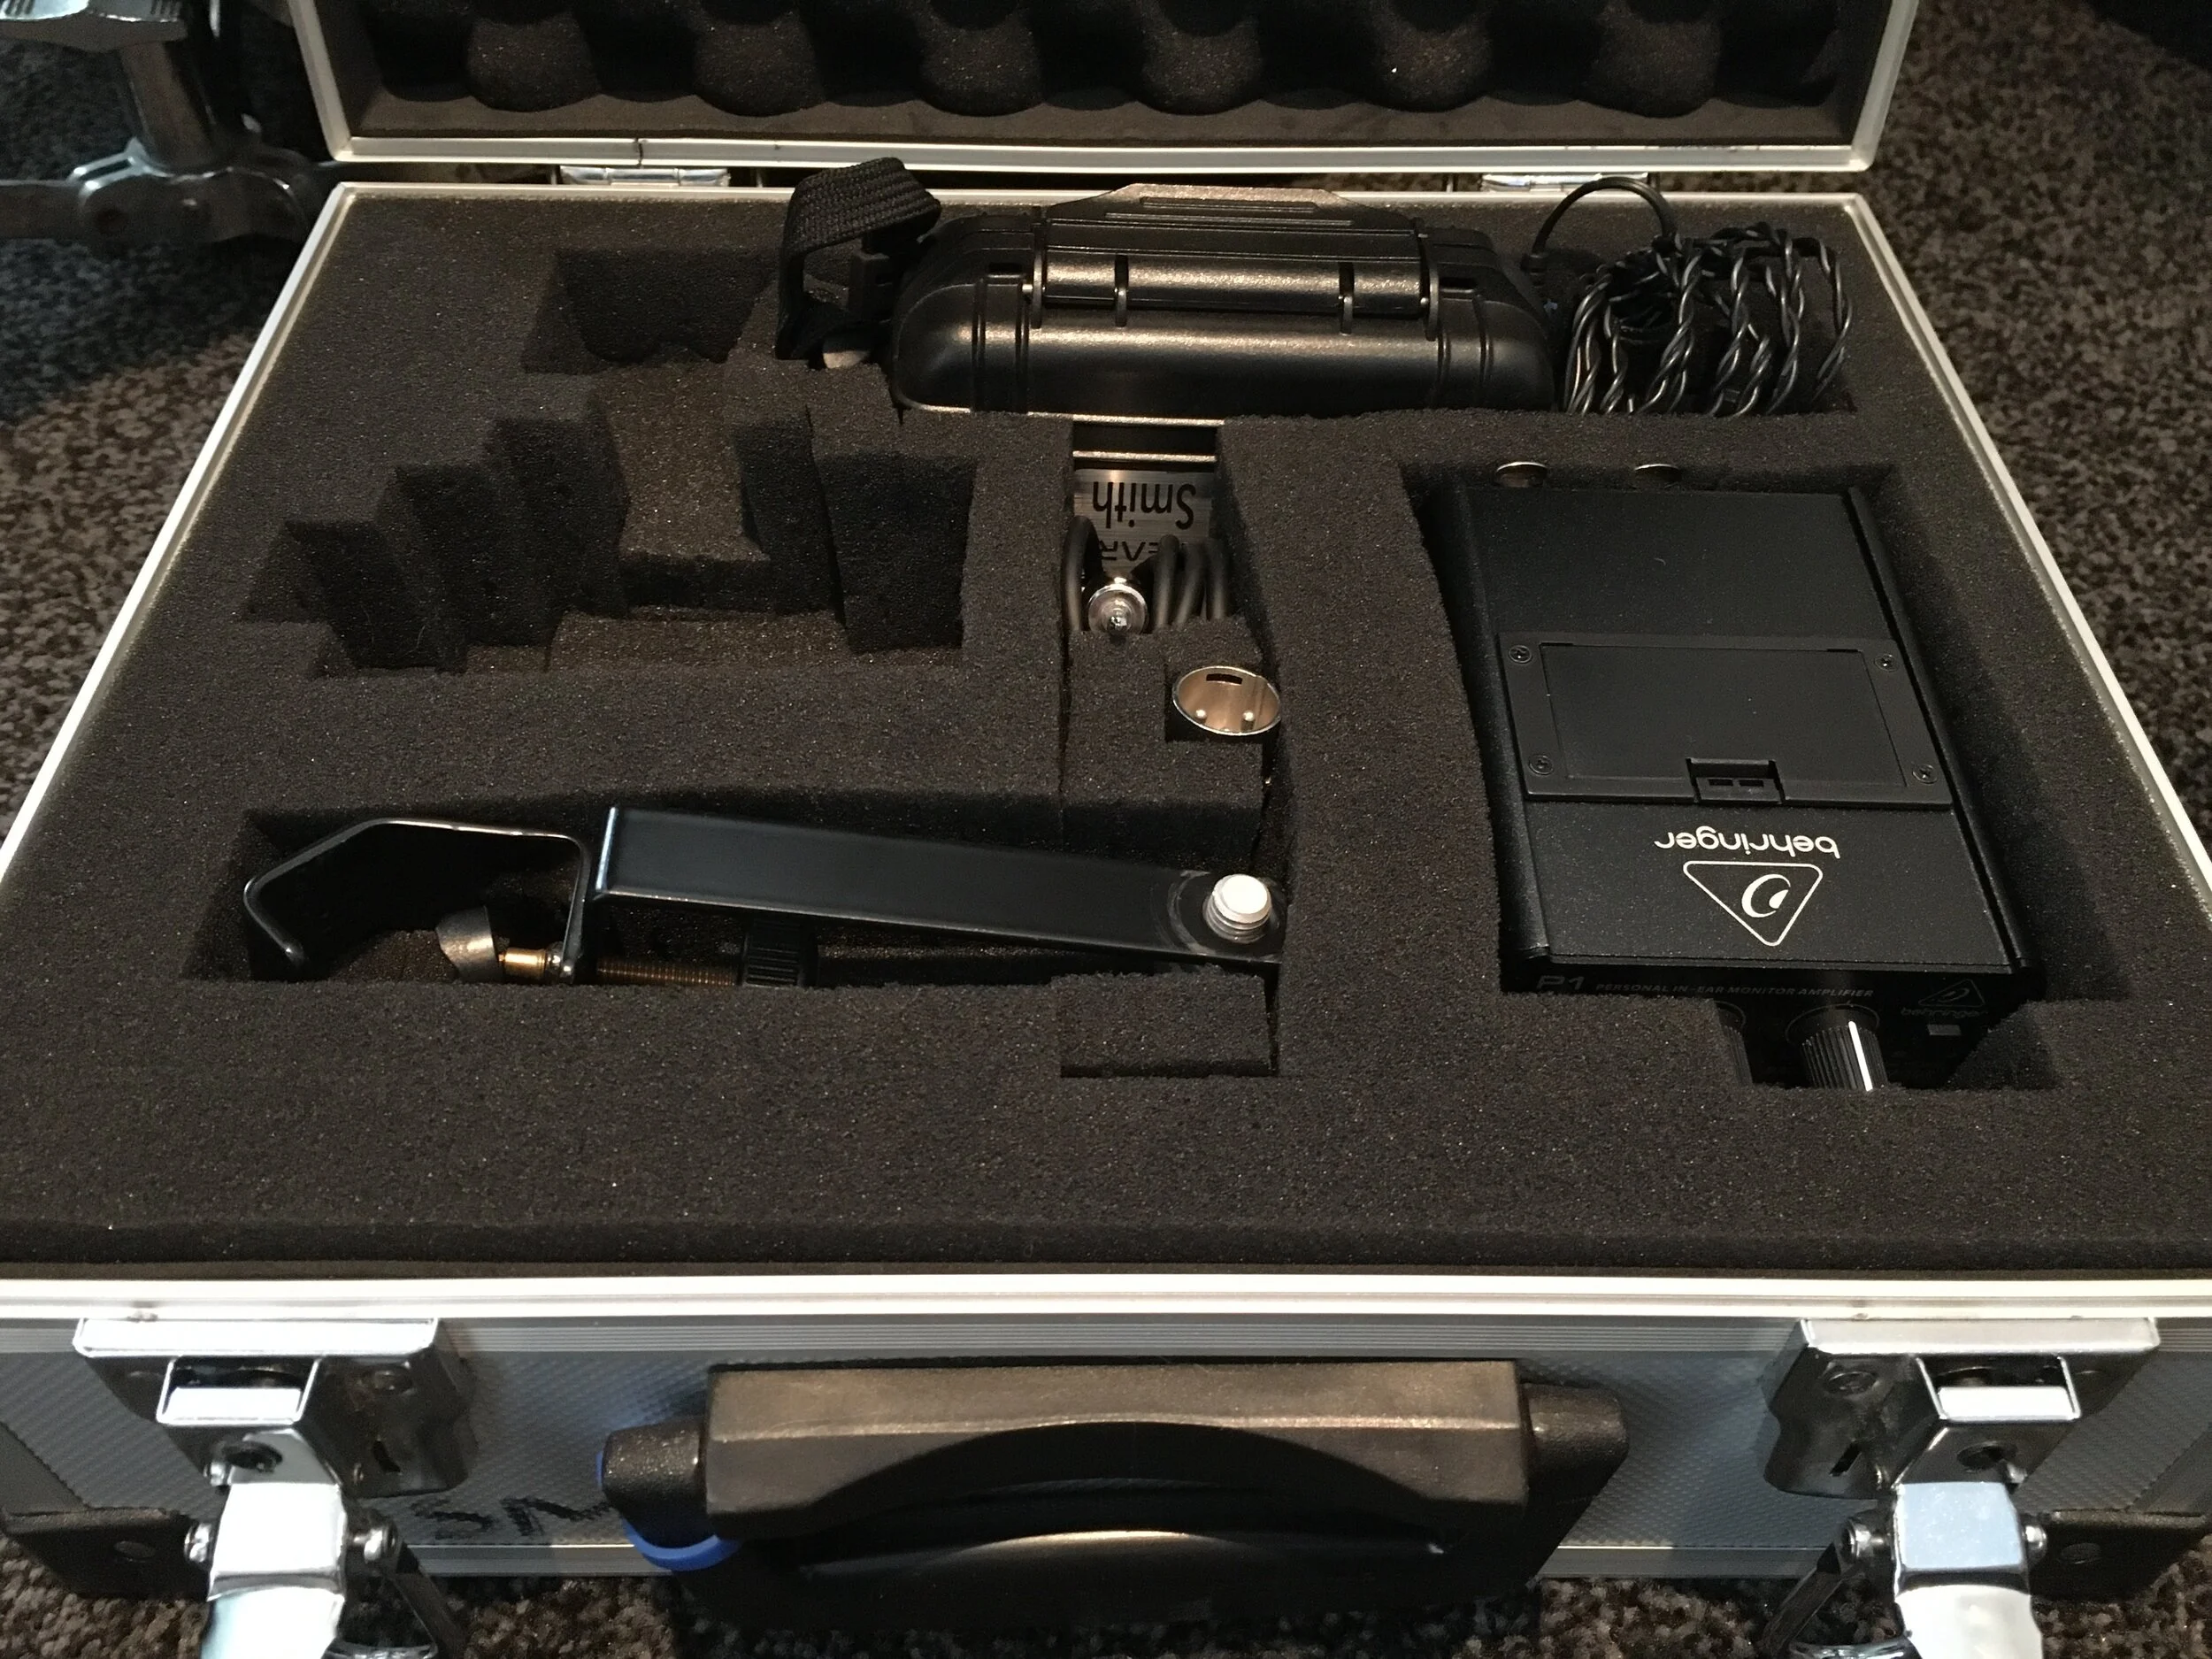
Case it up!
I’d always recommend keeping all of this stuff properly cased up for travel and touring, just to make sure it all arrives to the gig in perfect working order, and is protected in transit. I’d recommend a small flight case, which is a rigid case lined with foam, which will give a good amount of protection, without being overly large or heavy. A few cases will come with pluckable foam, which makes it really easy to customise the interior to fit all the gear you need. Though your in ears are usually cased already (as mine are in a plastic peli-style case) they still get put in the rig case, just to keep everything together and easy to move in one go. Theres a few key spares also worth keeping in your case, which are:
Spare IEM cable - No Matter which in ears you’re using, have a spare cable handy just in case, as it means you’ll hopefully never be caught out by a cable going bad on a gig
Cable adapters - Again, you’ll probably not need them, but worth having XLR to 1/4” Jack and 1/4” Jack to 1/8” Mini Jack at a minimum, just to get you out of any situations if they were to come up.
Batteries - As mentioned before, even if you’re running on the mains, have a couple of 9V batteries just incase your PSU breaks or there’s no power available for you.
XLR Cable and Extension lead - Carry at least 1 XLR, just incase you need extra cable length to reach your pack, a 10ft length is usually enough for this. A headphone extension cable (Mini Jack male to Mini Jack Female) is also a good idea, just incase you need extra cable length. A power extension lead is also worthwhile to get the mains power to right where you need it on stage. I have a black 2 gang lead, which (along with my XLR lead) is kept in my hardware case (as space is a little too tight on the IEM case)
IEM Cleaning tool - These little tools are a must have, to keep your IEMs clean and fresh before and after use, and get rid of any excess wax and keep them from getting blocked up.
Spare In Ears - It sounds crazy I know, but having a spare set is a much quicker change mid gig than swapping a cable or anything, the backups don’t have to be anything special or custom made, but they’re definitely worth having. I use my old Shure 215s for this very purpose.
Pics below of my case, the other area is usually filled by an AKG D112 Bass drum mic, and room also for a Shure SM57 snare mic, really handy keeping them all in the 1 case!


Summary
Hopefully this has helped you get yourself an IEM rig together, there’s plenty more resources linked below, and also a price breakdown to show how they came in budget wise. Sorry this has been a long read, but hopefully i’ve covered everything you needed to know! But if you have any questions about anything IEM, please feel free to get in touch via the contact page.
Using my Cosmic Ears CE3P’s on a session in London (2019, Photo by Adam Almeida)
To see the exact products I used, click on the links below (All prices correct at time of writing):
Behringer Powerplay P1 (Approx £40)
Shure SE215 IEMs (Approx. £100)
Power supply (Approx. £7)
Mount for the throne (Approx. £13)
Small flight case (Approx. £20)
Approximate total cost (with universal IEMs): £180
Cosmic Ears CE3P IEMs (Approx. £420)
Approximate total cost (with custom IEMs): £500
For further information, please see the links below:
Cosmic Ears: https://www.cosmicears.com
Drum Electric (Harry Younger): https://www.youtube.com/channel/UCTA4czSWJtlCghujnpAwohQ
Drumming Review IEM Article: https://drummingreview.com/best-drummer-in-ear-monitor-setup/
Video explaining mixers and more complex setups: https://www.youtube.com/watch?v=hyBhSLYOcl4
Video on a cased up IEM rig by Bearded Drums: https://www.youtube.com/watch?v=rVnkMUO56l8
Side Note: But what about Backing Tracks?!
Just a quick side note here, if you’re looking for a backing tracks rig that incorporates some of this same gear, my good friend Harry at Drum Electric has got you covered. Check out his video below for more information on getting a simple tracks rig together with a Behringer P1! (And check out his channel for all things streaming, backing tracks and hybrid drum kits!)